Measuring particle size distribution during the grinding process
How pharmaceuticals act, how efficient catalysts are and how effective and accurate printing inks function all depend on the size of the nanoparticles they contain. However, there are as of yet no methods for monitoring the particle size distribution during grinding processes. In the EU-funded PAT4Nano project, a consortium from industry and research has spent the last four years looking for practicable approaches for such inline measurements. The Fraunhofer Institute for Laser Technology ILT in Aachen has developed a promising laser-based method that could soon make such measurements possible.
Particles on a nanometer (nm) scale make all the difference in inkjet printing, vehicle catalytic converters and pharmaceutical production. "Their size distribution has a major influence on product properties in many applications," explains Dr. Christoph Janzen, who conducts research in the field of laser medical technology and bioanalytics at Fraunhofer ILT. For example, the degree of particle grinding in printing inks influences the reliability, costs and color effect in digital printing. So-called oversized particles – i.e. particles that are too large – can clog the inkjet nozzles. If they are ground too finely, the energy and time required in production increase and the print quality can also suffer. The situation is similar with nanoparticles for catalyst coatings. Both the catalytic effect and the raw material consumption of the precious metals platinum and iridium depend on the particle size distributions of the carrier materials aluminum and zirconium oxide: The optimum particle size achieves maximum catalytic efficiency with minimum precious metal input.
Particle size distribution is also important in the pharmaceutical industry because the size of the active ingredient particles determines how quickly they are dissolved in the body and how long their effect lasts. Some pain-relieving medicines have a drug-like effect when finely ground. Precision is, therefore, required in production. "If the specified particle size distribution is not adhered to, there is a risk that the entire batch must be discarded, which means the company could incur high financial losses," explains Janzen. However, as great as the influence of nanoparticles is on the properties of many products, it is difficult to measure them using currently available measurement and microscopy methods. This is especially true if the measurement is to be carried out inline during the grinding process. Because there are no practicable solutions for this, users have so far made do with in-process random sample measurements.
Making inline measurements of nanoparticles possible
In order to close this gap, a consortium of industrial companies, manufacturers of measuring and analysis equipment and research partners has sought new approaches for inline particle measurement. In the PAT4Nano (Process Analytical Technology Tools for Realtime Physical and Chemical Characterization of Nanosuspensions) project, they have spent four years advancing various analytical approaches to measure and analyze industrially relevant nanoparticles with funding from the EU's Horizon 2020 research framework programme. In addition to the Belgian companies Agfa-Gevaert and Janssen Pharmaceutica, the National University of Ireland in Galway and the Irish University of Limerick, Johnson Matthey and Malvern Panalytical from the UK and InProcess-LSP and TNO from the Netherlands, Fraunhofer ILT was also part of the consortium.
A team led by Janzen has developed a novel laser-based technology for particle analysis, which it has used to investigate particle size distributions of samples from applications in pharmaceutical, printing ink and catalyst production during the PAT4Nano project. The new method is able to measure the size and size distribution of particles (particle size distribution; PSD) during the ongoing grinding process. This task is challenging for particles in the size range of less than 100 nm because microscopic image-based methods reach their limits here. The team, therefore, had to dig deep into their photonic bag of tricks when developing the laser-based inline analytics.
Mathematical detours to precise inline particle measurement
"We developed our method on the basis of dynamic light scattering," explains Janzen. This measuring principle is based on Braun's molecular motion: In the liquid medium, the suspended nanoparticles are excited by collisions with molecules of the solvent and are in constant motion. The smaller the particles, the faster the movement. This is precisely where the laser measurement process comes in. "We focus a laser on the solution and analyze the scattered light or its temporary fluctuation," he explains. The particle size can be derived from the fluctuation using mathematical methods.
Two mathematical methods are commonly used: Fourier analysis leads to the actual particle size via the intensity distribution in defined frequency ranges. Alternatively, it is possible to use correlation analysis to draw conclusions about the particle sizes in the ground material based on the frequency of movement. If other parameters such as the viscosity or temperature of the liquid are included, the process can provide a very precise picture of the particle sizes and their distribution. According to Janzen, an absolute value is not always required. It is often sufficient for users to track how the "hydrodynamic radius" of the particles changes during the grinding process. "By comparing this to a perfect run, they can easily track how their process is progressing and when the desired particle size has been reached," he reports.
In addition to the mathematical approaches, the laser measurement process also involves imaginative engineering. This is because the inline measurement cannot take place in the ball mill, as the dynamic light scattering is based on the observation of undisturbed diffusion. However, it cannot be guaranteed that the particles diffuse freely in the liquid medium in a running ball mill, especially as the ground material is continuously mixed in it. Sampling by cuvette, on the other hand, does not fulfill the requirement of continuous process monitoring.
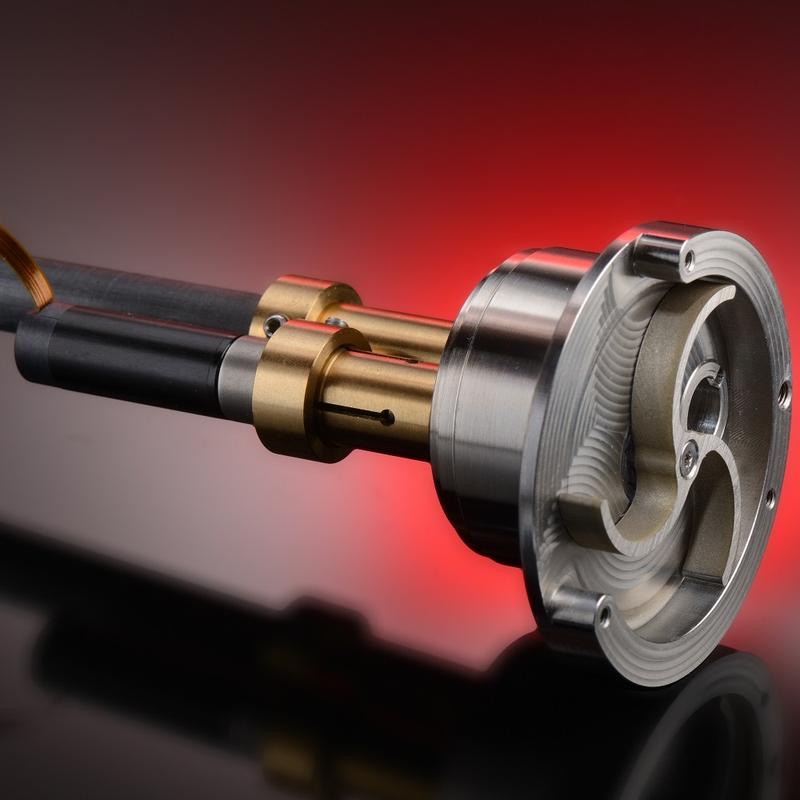
To solve the dilemma, the Fraunhofer team systematically analyzed the grinding process. This gave the researchers the brilliant idea: "In the ball mills typically used, the liquid medium is constantly pumped around," explains Janzen. The team used the optical measuring method in this liquid cycle. To guarantee the measurements are precise despite the moving liquids, the ILT researchers constructed an inline probe. A rotating impeller moves the sample liquid in front of the optical probe. When it stops, a closed space is formed in one of its chambers, decoupled from any flow. The particles can diffuse freely here, and an undisturbed measurement can be made. To analyze them, the team directs the laser through the probe onto the temporary measuring chamber. After the measurement, the impeller starts moving again, exchanges the analyzed sample liquid – and closes the measuring chamber against the outside again when it stops.
A further step toward a stable measurement method for nanoparticles used in industry
According to Janzen, the light is introduced into the solution via an optical fiber, whereby the focus point is variable. A second optical system captures the scattered light and also guides it via fiber to the detector, which records the signals. "The advantage of this method is that the measurements are taken under the same conditions that prevail in the grinding process," he says.
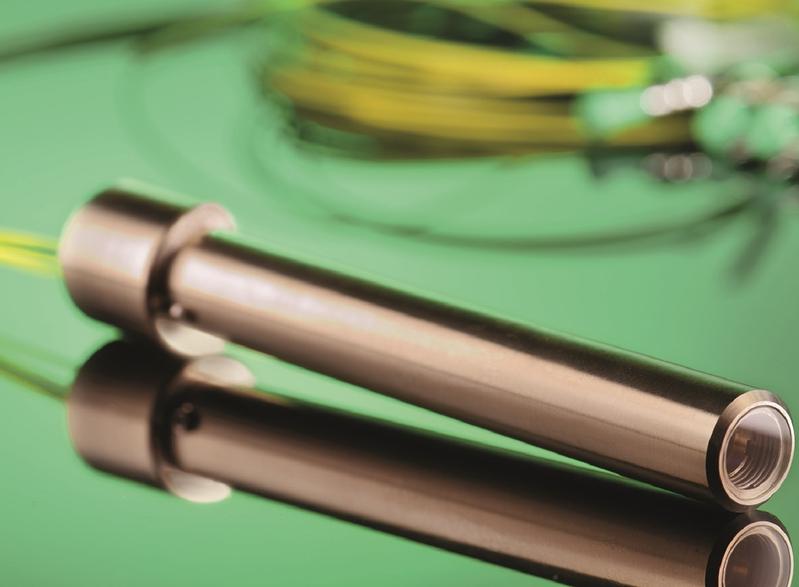
One challenge that has not yet been fully resolved is that the particle concentration in the liquid is high, and it is not possible to dilute it from the outside. This increases the probability of multiple scattering, which can falsify the measurement results. In order to extend the concentration range, the researchers experimented with a completely new approach: 3D cross-correlation. This uses a modified immersion probe, which can carry out two DLS measurements at the same location and compare fluctuating signal intensities with each other using cross-correlation. This way, the concentration range can be extended because the interfering multiple scattering can be filtered out when the signals are compared. To ensure that both measurements capture exactly the same particles, the team has designed a special optics holder and manufactured it using selective laser etching (SLE). They aim to achieve high-precision focus superimposition by directing the light from two excitation lasers in two beam paths through one and the same aspherical lens at exactly the same particles and capturing the scattered light via two further beam paths. Through consistent miniaturization, they were able to integrate the optical system into the immersion probe. However, the approach proved to be very complex over the course of the project. "It is not yet robust enough, but the results with the SLE-manufactured holder are promising," says Janzen. This is also because two different wavelengths (785 nm and 795 nm) were used for excitation in order to separate the scattered light signals from the two DLS experiments.
The detection quality of the cross-correlation approach still lags behind autocorrelation. To compensate for its disadvantages at high particle concentrations, the partners have positioned the focal point close to the glass pane of the probe: the lower the penetration depth of the laser into the liquid, the lower the probability of interfering multiple scattering. Janzen's conclusion: "In the PAT4Nano project, we have succeeded in developing an inline measurement method by systematically testing various approaches; it enables us to conduct PSD analyses of particles around 100 nanometers in size directly in the ongoing grinding process." The next step is now to bring the process to series production with partners from various user industries and measuring device manufacturers.
Wissenschaftlicher Ansprechpartner:
Dr. rer. nat. Christoph Janzen
Group Laser Medical Technology and Bioanalytics
Telephone +49 241 8906-8003
christoph.janzen@ilt.fraunhofer.de
Dr. rer. nat. Achim Lenenbach
Head of Laser Medical Technology and Biophotonics
Telephone +49 241 8906-124
achim.lenenbach@ilt.fraunhofer.de
Fraunhofer Institute for Laser Technology ILT
Steinbachstraße 15
52074 Aachen, Germany
www.ilt.fraunhofer.de
Weitere Informationen:
https://www.ilt.fraunhofer.de/en.html
Ähnliche Pressemitteilungen im idw


